
Welcome to SWIFITCH SW repository. If you didn't come here through HW repository, and want to know more about SWIFITCH go have a look.

-
Some MQTT server (If you have Raspberry Pi use Mosquitto) - this is now optional
-
Optional is Homebridge with MQTT Plugin to control the relay from iDevices
-
Optional that will make your life easier with IoT is Node-RED, plus you can get decent dashboard with Node-RED Dashboard plugin
-
PlatformIO best Arduino IDE available, hacked from ATOM text editor
-
WiFi Manager this library is included and quite a bit altered for Swifitch graphics etc.
-
ESP8266 WiFi library
Install using PlatformIO Library Manager
pio lib -g install PubSubClient
pio lib -g install ESP8266wifi
pio lib -g install ESPAsyncTCP
- Flash the software to your freshly soldered Swifitch
- Connect to the SWIFITCH_XXXXXXX WiFi
- Click Configure Swifitch
- Select your WiFi or enter SSID manually
- Remove the chip
- Connect your Arduino with Swifitch with dupont wires according to this mapping:
| Swifitch | Arduino |
|---|---|
| RX | RX |
| TX | TX |
| 3v3 | 3v3 |
| D3 | GND |
| GND | GND |
Arduino RESET -> Arduino GND
- Flash with PlatformIO

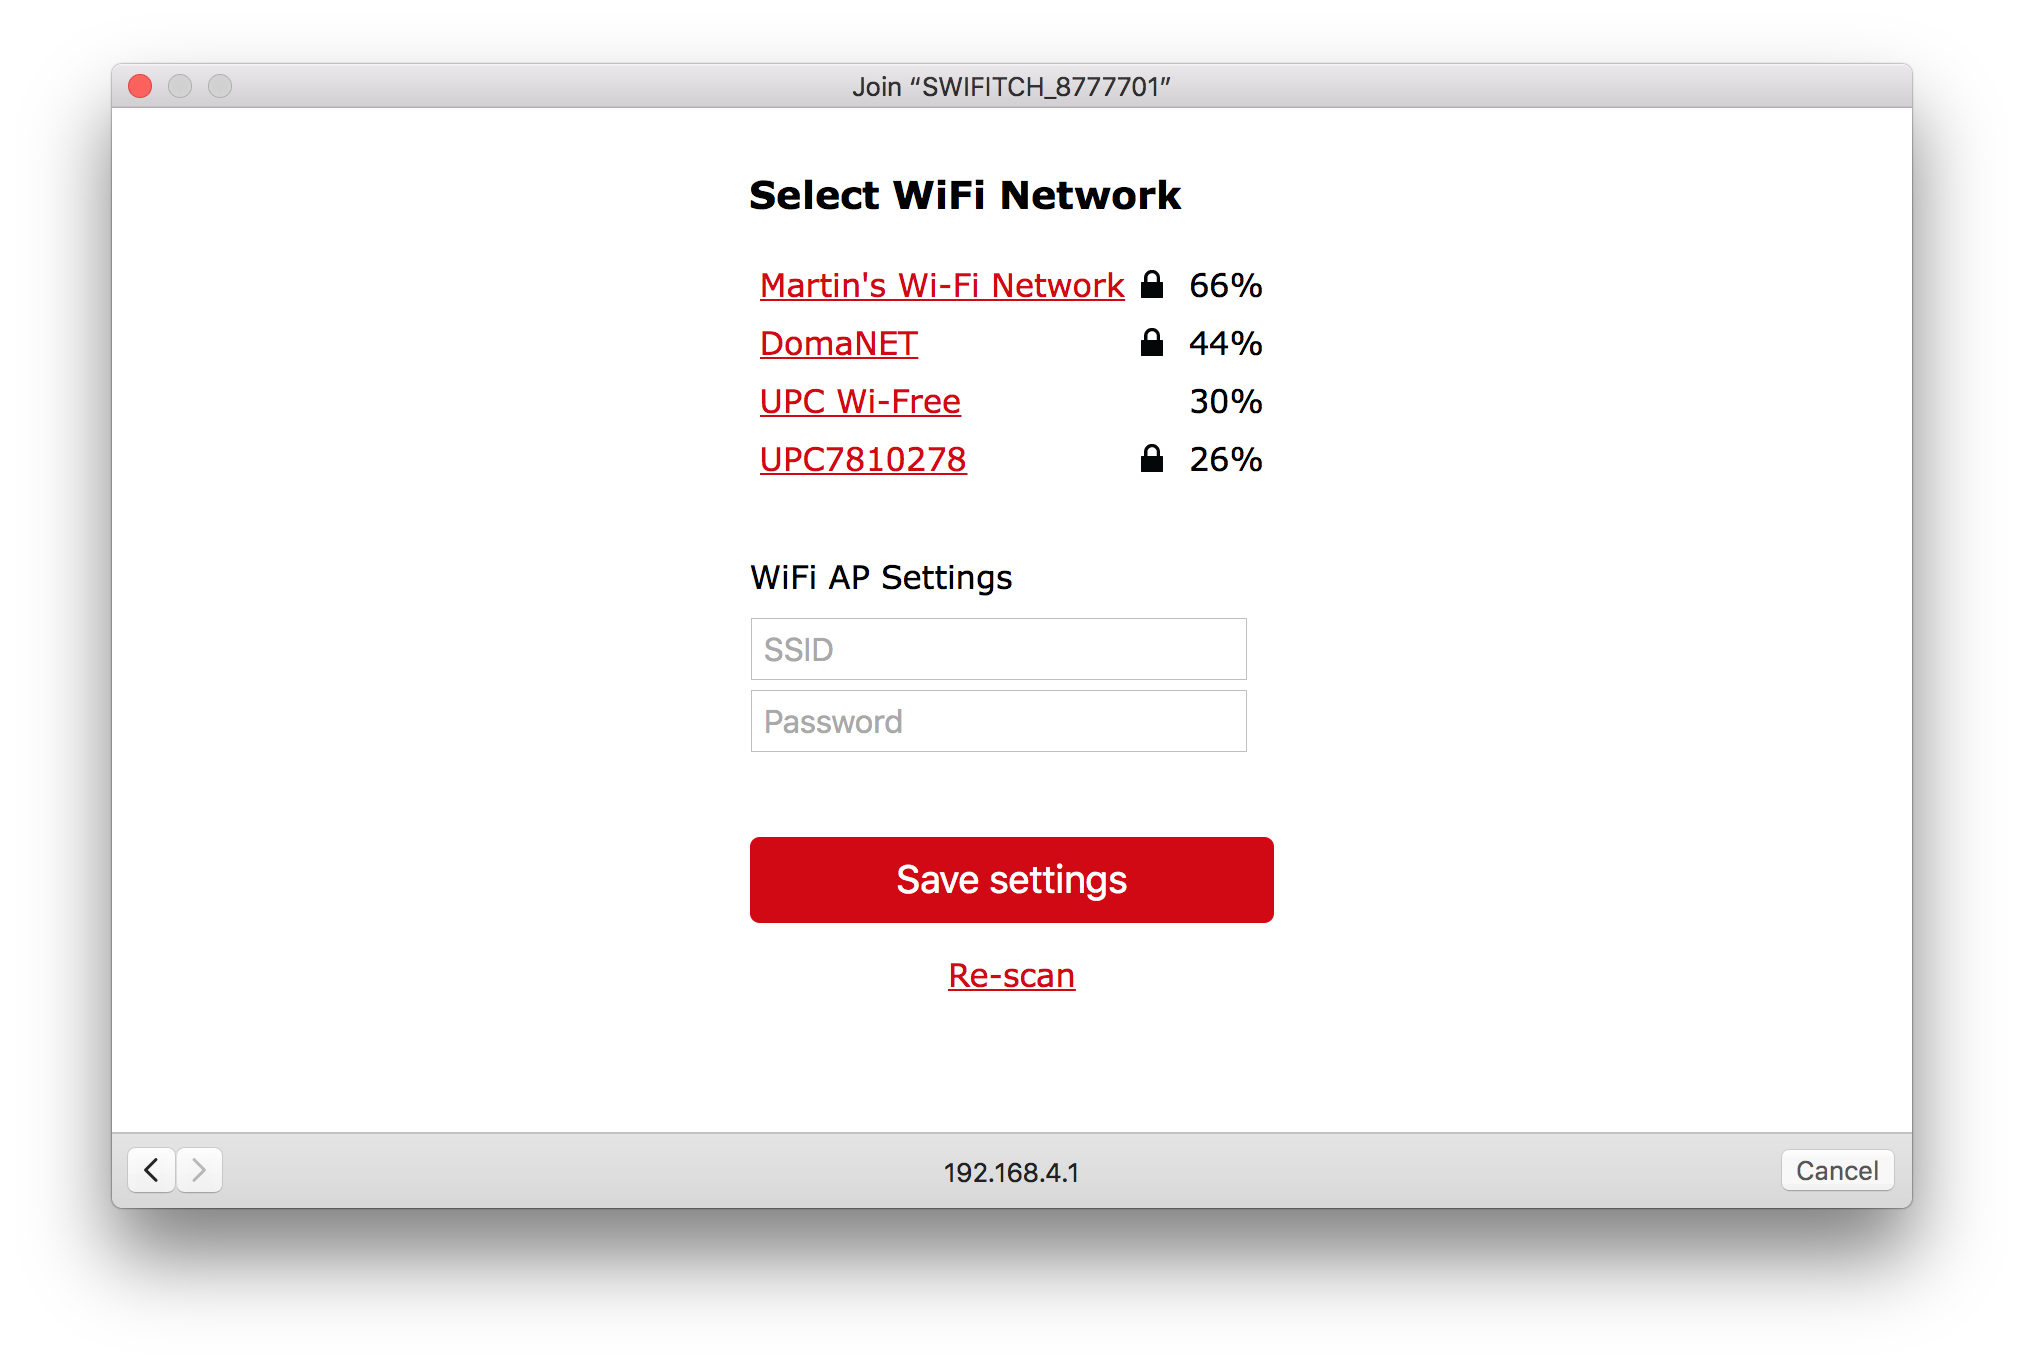
After initial configuration of Wi-Fi, go to your browser and open IP address that was assigned to swifitch, followed by /config. You should be asked for login which is admin:swifitch by default. Cannot be changed right now as it is hardcoded.
Within this configuration portal make sure you have set at least hostname, it will make it easier for your to identify and access this module in future using hostname.local URL.
Enabling other functions is merely up to you.

Send command through your MQTT server as such:
| TOPIC | DESCRIPTION |
|---|---|
| home/room/swifitch | Send 1/0 to turn ON/OFF |
| home/room/swifitch/getstatus | Send anything to get current relay pin status (digitalRead) on topic home/room/swifitch/status |
| home/pingall | Send whatever and you get response at topic home/pingallresponse |
Receive back from your device:
| TOPIC | DESCRIPTION |
|---|---|
| home/room/swifitch/devicestatus | Will contain device status eg. connected |
| home/pingallresponse | This will contain status after you send pingall request and all devices should respond |
| home/room/swifitch/status | This listens for status change to set correct status eg. in Homebridge |
| URL | DESCRIPTION |
|---|---|
| / | Check webserver status |
| /toggle | Change relay state, return JSON response |
| /info | JSON response with relay status and other device info |
| /mqtt | JSON response with MQTT status and settings |
Swifitch will be automatically discovered by Amazon Echo since it fakes being a WeMo device and it doesn't require any server/homebridge setup.
Not working with Gen2 Echo devices, waiting for fix.
To control swifitch with physical switch, just connect your existing HW switch to swifitch according to scheme.
DO NOT LEAVE ANY HIGH VOLTAGE WIRES CONNECTED TO THE SWITCH
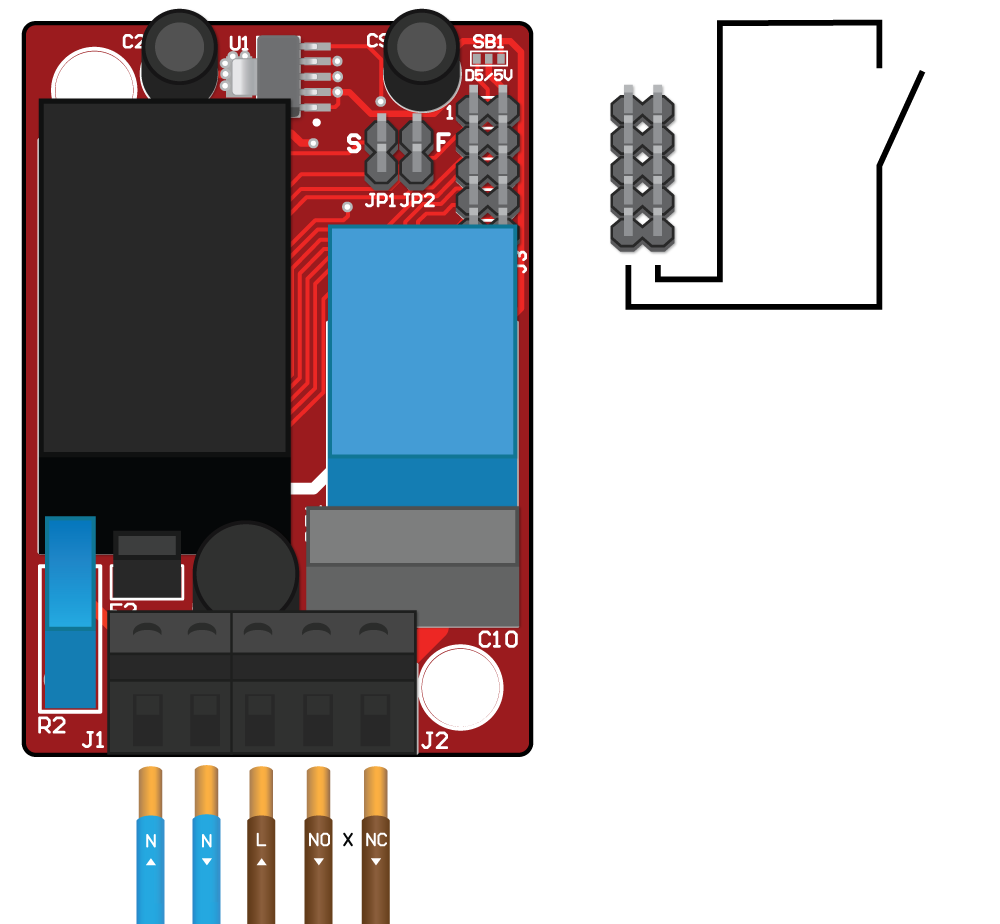
To enable this function, go to webconfig and enable Physical switch option and save.
Thanks goes to Alexander Luberg for pointing out that there is no need for external pulldown or pullup resistor for physical switch.